
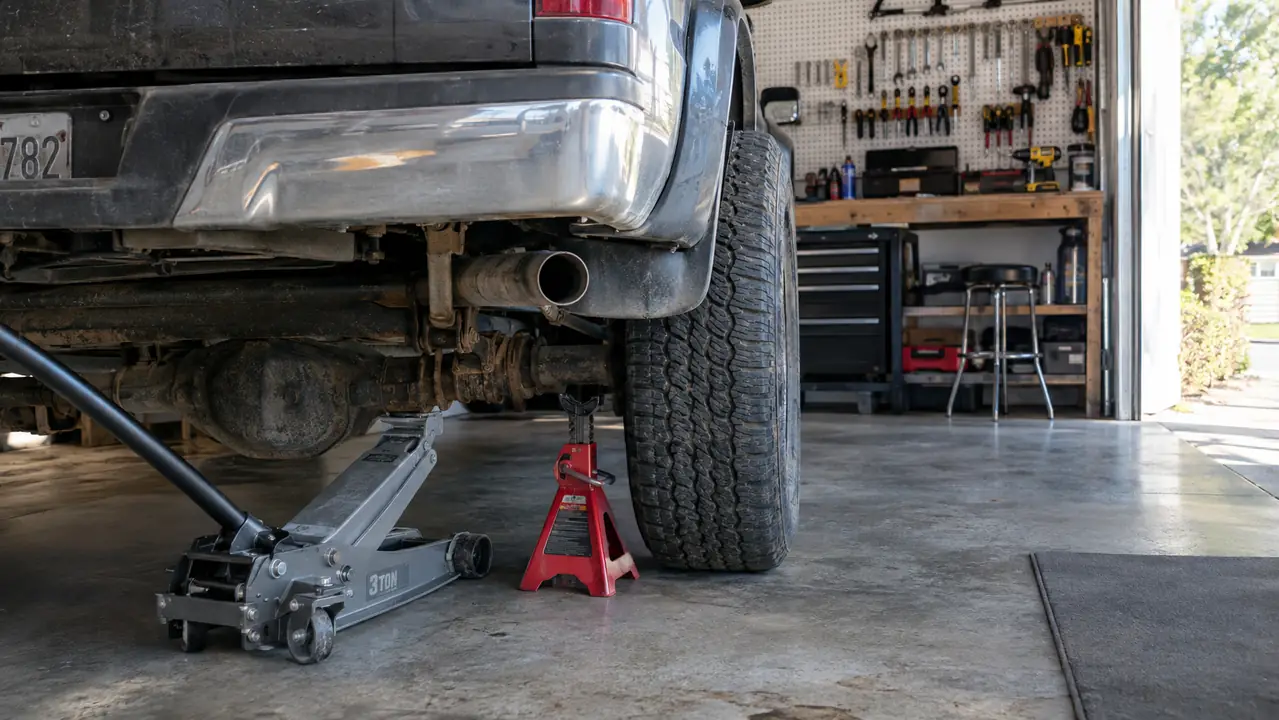
The first time I watched a guy crawl under a pickup that was sitting on nothing but a floor jack, I was twenty-two and too polite to say what I thought. Thirty years later, I still remember the feeling. A floor jack is a lifting tool, not a holding tool. It gets the truck up so you can put something solid underneath it. That something is a pair of jack stands, and the order you do things in matters more than most people realize.
I have a 2014 F-150 that I do all my own work on, and the jack that lives in my garage is a BIG RED 3-ton floor jack. It has lifted that truck more times than I can count, for oil changes, brake jobs, tire rotations, and one memorable afternoon replacing a fuel pump. This guide is the exact sequence I use, the same one I used on shop trucks for three decades. If you follow it, you can get your truck up safely and get back down without a single scary moment.
The 3-Ton Floor Jack That Has Lifted My F-150 for Years
A BIG RED 3-ton floor jack with a wide saddle and a long frame is the one I reach for every time I work on my truck. It lifts high enough for jack stands and rolls easily on a garage floor.
Amazon Check Today's Price on Amazon →Step 1: Park on Level Ground and Chock the Wheels
Level ground is not a suggestion. If the truck is on even a slight slope, the whole lift goes sideways and the load shifts in a way you do not want to be standing next to. My garage floor slopes about an inch and a half over its twelve-foot depth, which does not sound like much until you set a jack on it. One Saturday in March, a neighbor asked me to help him rotate the tires on his Ram. He had it parked nose-down on his driveway, which slopes maybe two degrees, and the jack walked sideways before the tire cleared the ground. He caught it before it dropped, but neither of us got under that truck until we moved it to the flat spot by the garage door. That is why I park my F-150 nose-out on the flat part of the floor, with the drain slope running side to side instead of front to back.
Then I chock the wheels that stay on the ground. If I am lifting the front, I chock the rear wheels on both sides. If I am lifting the rear, I chock the front wheels. I use a pair of rubber chocks about six inches long with a grip pattern molded into the bottom, and I set them tight against the tire, not an inch away. A chock that sits loose is a chock that lets the truck move. A couple of rubber wheel chocks work fine, but a block of wood does the same job. The point is to make sure the truck cannot roll while the wheels are off the ground.
One more thing before you grab the jack: put the transmission in park if it is an automatic, or leave it in gear if it is a manual. The parking brake plus chocks plus transmission is three separate ways to keep the truck from moving. I have never needed all three, but I have never regretted having them.
Step 2: Find the Right Lift Points on the Frame
The owner's manual for your truck will show you the factory lift points, and that is where you should put the jack. On my F-150, the front lift points are on the frame rails behind the front wheels, and the rear points are on the axle or the frame ahead of the rear wheels. If you are not sure, look at the manual. Guessing is how bent rocker panels happen.
The BIG RED 3-ton floor jack has a wide saddle, which spreads the load across the frame rail instead of concentrating it on one small spot. That matters on a pickup because the frame is strong, but the sheet metal around it is not. The frame rail on my F-150 is about six inches wide where the front lift point is marked, and the saddle covers most of that width. I line the saddle up so the rail sits in the center of the pad, not off on one edge. Put the saddle right on the frame rail, not on the body pinch welds, not on the suspension arms, and not on anything that looks like it might hold weight.
If you are lifting the rear of a truck to change a tire or do brakes, you can often place the jack under the axle housing. That is a solid point and it lifts both rear wheels at once. For the front, the frame rail is the right call. When in doubt, the owner's manual is the final word. The first time I lifted this truck, I put the jack under the differential because it looked like the obvious solid spot. The truck went up, but it sat nose-high, and when I tried to set the stands under the frame rails they did not line up. I lowered it, moved the jack to the frame rail, and it went up level. That is the difference between a lift that works and a lift that fights you.
Step 3: Raise the Truck Slowly and Steadily
Position the jack so the saddle sits flat against the lift point, then pump the handle slowly. A floor jack lifts on the upstroke, so each pump raises the truck a little. There is no benefit to rushing. A steady rhythm keeps the load balanced and gives you time to notice if the saddle is slipping off the frame rail.
As the truck comes up, watch the contact point. If the saddle starts to slide or the frame rail looks like it is not centered, lower the truck and reposition. That is not a failure. That is the system working. I have repositioned a jack more times than I can count, and I have never once regretted the extra thirty seconds. I pump with my left hand on the handle and my right hand on the saddle so I can feel if it starts to shift. It sounds fussy, but it has saved me twice when the saddle was not quite centered. If the handle starts getting hard to pump, I stop and check the release valve. I once watched a guy pump for five minutes on an open valve, wondering why his truck was not going up.
Raise the truck high enough that you can get the jack stands under the frame with a little room to spare. You do not need the truck sky-high. You need enough clearance to set the stands at their rated height and then lower the truck onto them. For most pickups, that means raising it until the tire is just off the ground, then a bit more. On my F-150, I raise it until the front tire is about two inches off the concrete. At that height the frame rail sits roughly eighteen inches off the floor, which is enough to set a six-ton stand at its middle notch and still have room to lower the truck onto it.
Step 4: Set the Jack Stands and Lower the Truck Onto Them
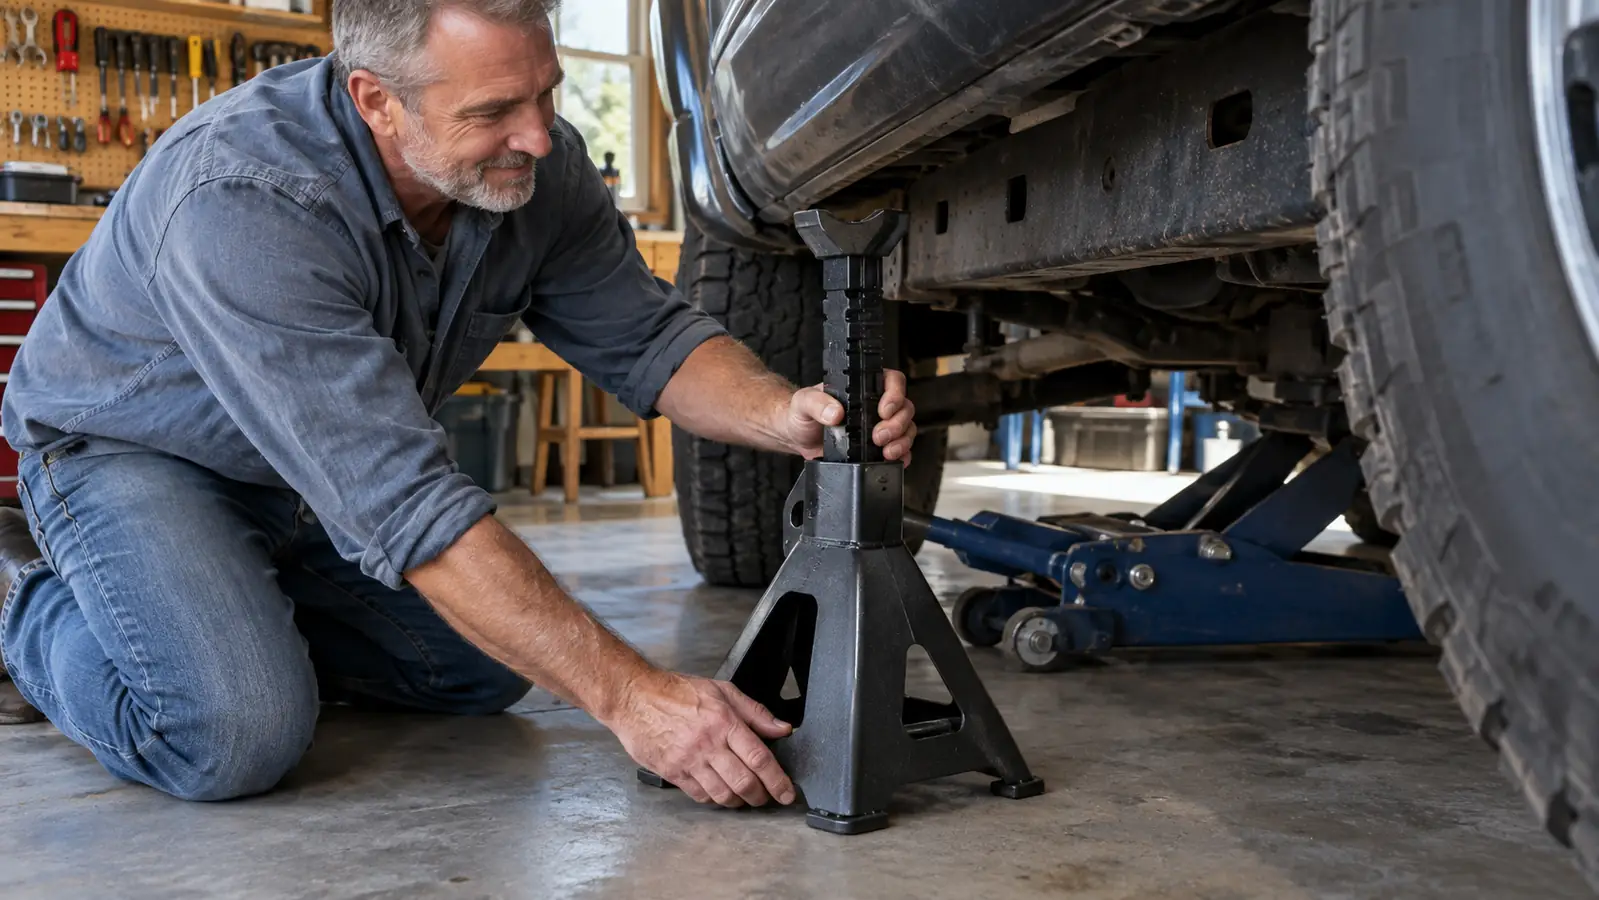
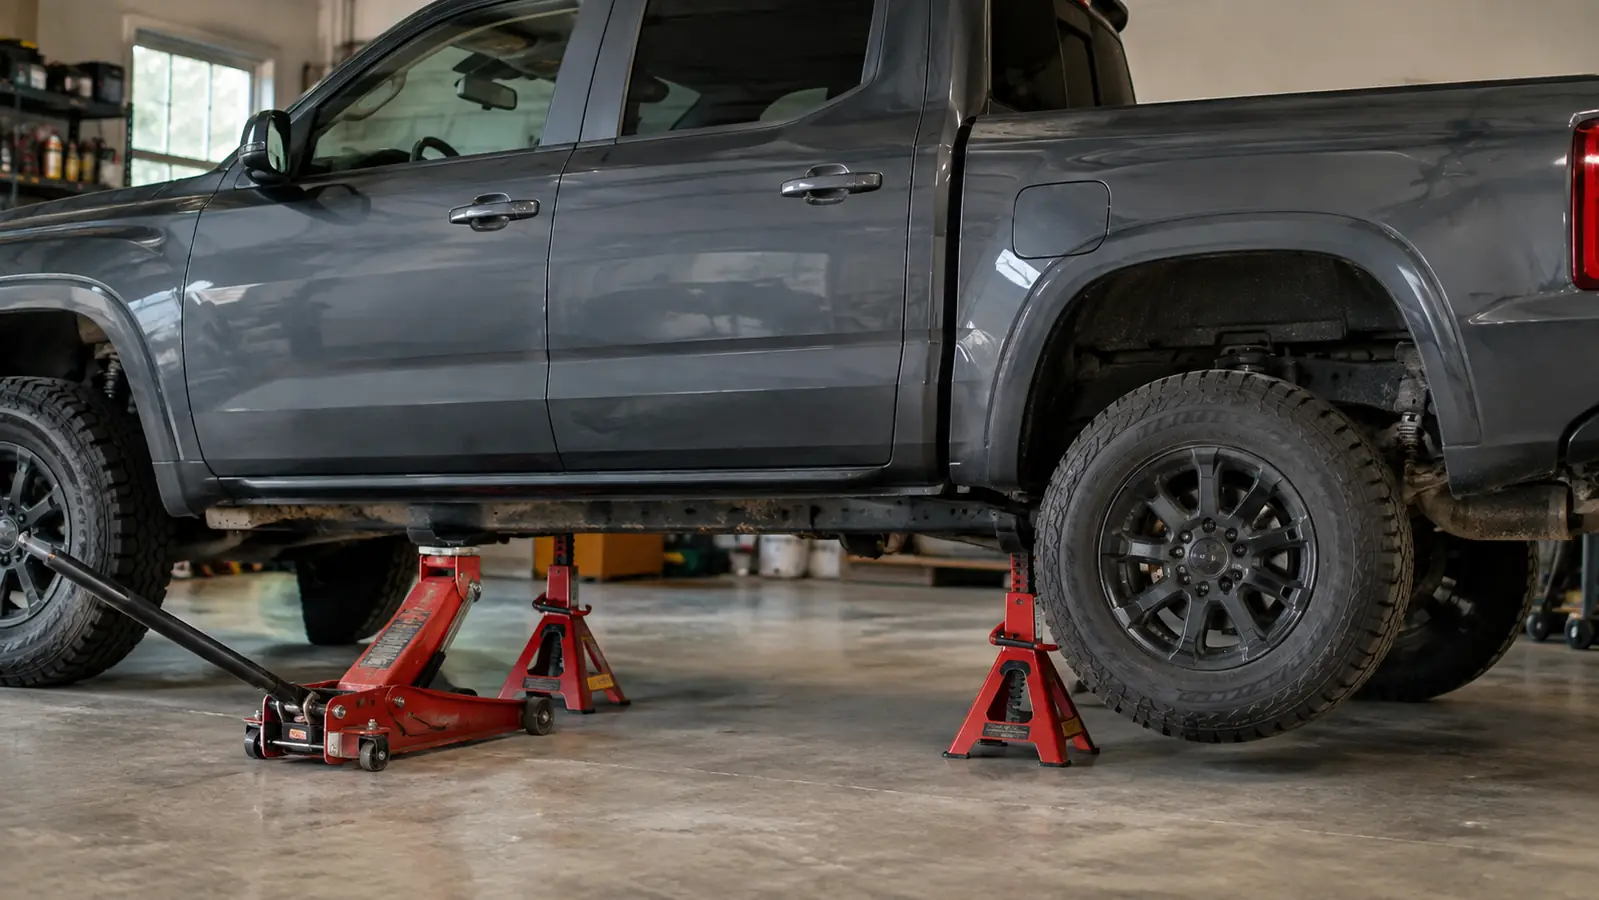
This is the step that separates people who work on trucks for a living from people who learn the hard way. The jack stands go under the frame, not under the axle, not under the suspension, and not under the floor pan. On my F-150, I set one stand under the frame rail ahead of the front wheel and one behind it, so the weight is spread across two points. The fuel pump job I mentioned earlier is a good example of why stand placement matters. I had the truck up on four stands, two under the front frame rails and two under the rear axle, because I needed the whole truck level to drop the fuel tank. I set the rear stands by eye and the truck came down cocked a full inch. The tank would not come out, and I spent twenty minutes figuring out why. I lowered the truck, moved one rear stand up a notch, and everything lined up. Now I set stands by the numbers, not by how they look.
Make sure the stands are on solid ground and the locking pins are fully engaged. The stands I use have a base about nine inches square and a rated capacity of six tons each. That is more than the truck needs, but a wide base does not sink into soft ground the way a small round base will. Adjust them to the same height on both sides before you lower the truck. Then lower the jack slowly, a quarter turn of the release valve at a time, until the frame settles onto the stands. You will feel the truck transfer its weight. Give the truck a gentle push at the bumper. If it rocks solid, the stands are doing their job. The release valve is the one part of the jack I never touch in a hurry. A quarter turn at a time is the whole trick, and it is the difference between a controlled settle and a drop.
Once the truck is on the stands, lower the jack all the way and slide it out from under the truck. The jack is no longer part of the equation. The truck is on the stands, and the stands are what you trust. If you are only changing one tire, you can leave the jack in place as a backup, but the stands are still the primary support.
Step 5: Do a Final Shake Test Before You Get Under the Truck
Before I put any part of my body under a truck, I do the same check every time. I push down hard on the bumper, then push sideways. If the truck moves more than a fraction of an inch, something is wrong. I recheck the stands, recheck the ground, and recheck that the parking brake is still set. Then I push again.
I also look at the stands themselves. The base should be flat on the floor, the ratchet bar should be fully engaged, and the locking pin should be through the hole. A stand that looks crooked is a stand that is not doing its job. Fix it before you get under the truck, not after.
When the truck passes the shake test, I put a work light under it, grab my creeper, and get to work. The whole process, from parking to passing the shake test, takes about five minutes. That five minutes is what lets me sleep at night after a long day in the garage.
What Else Helps
A good floor jack and a pair of jack stands are the core of the setup, but a few extras make the job easier and safer. A rubber pad on the jack saddle protects the frame rail and keeps the jack from sliding. A pair of mechanic's gloves saves your knuckles when you are reaching into tight spots. And a creeper means you are not lying on cold concrete while you work.
I also keep a short piece of 2x6 in the garage. If the floor is uneven or soft, the board gives the jack and the stands a solid base. It is a cheap piece of insurance, and it has saved me more than once on a gravel driveway.
A floor jack gets the truck up. Jack stands keep it up. The five minutes you spend setting stands properly is the cheapest insurance you will ever buy.
Get the Same 3-Ton Jack I Use on My Own Truck
The BIG RED 3-ton floor jack has been under my F-150 for years. It lifts high, rolls smooth, and has never let me down. If you work on your own truck, this is the jack to have.
Amazon Check Today's Price on Amazon →